Monday, 3 May 2010

Sources

Background music: http://www.youtube.com/watch?v=1QqdlXtTIjE
Footsteps: http://www.danshost.com/rm2k/Sound/s12_sfx_barrel.wav
Water drop: http://ricostardeluxe.free.fr/goutte.wav
Drinking: http://www.lettersnstuff.com/sounds/animals/dog_drinks.wav
Wing flapping: http://toxicbag.com/sounds/fire_whoosh_dual.aif

Pitcher texture: http://free-textures.got3d.com/architectural/free-rusty-metal-textures/images/free-rusty-metal-texture-002.jpg
Pebble texture: http://www.johnsusek.com/projects/textures/lawdogs/sand_2.jpg
Ground texture: http://lh6.ggpht.com/_s_L4k72MVl4/SVaV2G2rIDI/AAAAAAAAAIY/DfVa56aYMUg/Picture798
Sky texture: http://www.smemon.com/wp-content/uploads/2007/06/bluesky1.jpg
Sunset texture: http://mayang.com/textures/Nature/images/Clouds/varied_clouds_sunset_281795.JPG

Conclusion

Now that my animation is completed, I would say that it was a success. It presents Aesop's fable of the crow and the pitcher well, and isn't boring. The music really makes it come to life, and makes it enjoyable to watch. It kept true to it's cartoon style most of the way though as well.

The animation itself, I am quite proud of and the result was better than I thought possible at the start of the year. I am most please with the pebble-drop scene, the penultimate scene and the final scene. I am also pleased with the scene where the crow discovers the pitcher, as the camera motion is different from the rest.

I would have liked to use morpher to animate facial expressions, but as there is very little a crow can do, and there is no lip syncing, it wasn't needed. Although I would have also liked to include voices, it wouldn't go with the style I was trying to achieve.

After rendering the last scene, I realised there was a mistake in the model itself, and that the tail wasn't capped. This wasn't obvious in the other scenes as the model was black and 2-side. However, it is visible for about half a second in the final few frames of the animation.

I think that the lighting I used worked well for the scene, although I would have liked to have used skylight more to make it seem brighter (The render time is much too long) . Increasing the intensity of the target light didn't have the same effect. Also, the transition is the end makes the point of "cooling" the scene.

The main problems I had with the creation of the model came from weighting the vertices. It became easier once I realised how weighting worked, and that each one had to add up to 1. I used mirror mode to complete the process in half the time it would have taken manually though. being able to move the bones successfully was a challenging task as well. However I found that if you move a bone, then fix the weights, the bone will be able to move freely without problems.

I am happy with my use of camera shots, I believe they convey each scene very well and are not completely static all the time. I have made use of the environment to maximise the effectiveness of each shot. From the footprint in the sand, to the reflection in the water, to the flight through the clouds.

If I were to change the project, I'd probably keep most of it. Although I'd fix the problems I've listed previously, maybe put more detail in the crow's texture and add a wider range of movements. I'd probably make it longer and add more scenes in between, including better scene transition.

Personally, I have enjoyed the assignment and feel like I have learnt a great deal about 3DS Max and 3D animation in general. However, it is probably not the primary area I wish to pursue after my studies are over. Although I may continue to use the program for model design and simple animations.


Editing

Using Adobe Premier Pro, I assembled the clips from each scene. All of which had been rendered using the Microsoft video 1 compression. When all of the clips were assembled, I added sound to the timeline. This includes the crow's footsteps, the drop of the pebble into the water, the flapping of the wings, the crow drinking and the background music.

I believe the transition between each clip worked out well, and there are no large unexplainable jumps.

I had a problem in that I didn't realise the resolution had to be 800 x 600, and all of my renders were in 680x420. Thankfully, Premier Pro allowed me to scale my work up to 800x600 post-render without any noticeable loss in quality.

Scene 17

The final scene took the longest to do, despite it being the only one created using an external tutorial. You see the crow flying through clouds in the sky. The camera follows it, panning side to side in places, until the end, at which point the camera stops and the bird continues on.

I followed the tutorial at http://www.3dtotal.com/team/Tutorials_3/jussing_clouds/creating_clouds_3dsmax01.php, then changed a few part to make it my own.


I created a particle generator and used the above image as the material. I also used it as part of a mask for an opacity map, the actual map being smoke.

I created a path for the crow and camera to travel on and assigned the controller to the path constraint. The camera itself follows a dummy node, this is so the target can be moved for more effect. The camera pans as it goes along.

I created a cylinder, and used the PathDeform (WSM) tool to shape it around the path and made it unrenderable . I made the cylinder the source of the particles and directed a red light at it. I increased the particle count and changed the colour of the light, as well as the camera angle and shots. There is a slight pause in between the flight movements, this is unintentional but can be used to simulate gliding.

I believe this scene is a very good ending to the animation, as you see the crow flying off into the distance, representing the crow escaping the harsh terrain and returning home.

Saturday, 1 May 2010

Scene 16

In the penultimate scene, the crow can be see taking off from the ground and flying off, with the pitcher in the foreground. The colour of the scene fades to a deep red, symbolising the heat of the scene has reduced as the crow is no longer parched. This is done by altering the colour of the target light. The background has changed also to a sunset, to match the colour change.

As the crow takes off, it tucks it's legs beneath it and flaps it's wings. This is the first time you see the crow flying in the animation, so it is a big scene. The take off and flight is a .bip file.

I though of making it longer and having this as the final scene, but I decided to make one of it flying through clouds.

Friday, 30 April 2010

Scene 15

In this scene you can see the crow drinking the water. There is a slight ripple on the water although it is barely visible. This scene is identical to scene 7, with the water level raised.

It shows that the crow achieved it's goal of getting the water from the pitcher.

I did attempt to add ripples to the water, although it proved more difficult than the previous scene, and decided to be content with what there was.

Thursday, 29 April 2010

Scene 14

In this scene, you can see the pebbles going into the water repeatedly. As this happens, the water ripples and raises. This occurs 3 times in the scene. The animation is created by there being 3 pebbles waiting to fall. They are set as unyielding, meaning they aren't affected by the gravity. When they are needed, the unyielding checkbox is unchecked, and an animation is created for the next 100 frames. The camera and the pitcher are the moving objects, rather than the water.

I had alot of problems with this scene, the first of which being finding a way to get the pebbles to drop one at a time. I tried setting them up one above another, but the gravity caused them to accelerate and have too much force. This was solved as stated above. The next problem was the water would go wildly out of control after 4 pebbles for some reason, to fix this I kept the number to 3 maximum. The next problem was the lack of ripples from the drops. This was caused by the plane moving when raising the water. I fixed this by removing the pitcher from the rigid body collection, and moving it and the camera instead.

The raising of the water isn't supposed to be realistic, as it's just to make it obvious that the water level is rising. However, I could have done drop->raise->drop->raise, but I prefer this motion.

Scene 13


This scene is the same location as scene 10, although with a different animation. In this scene the crow walks up to the pebbles and bends down to pick one up. The lighting and skyline are the same as scene 10.

The purpose of this scene is to show the repetition of picking up pebbles to drop into the water.

Wednesday, 28 April 2010

Scene 12

In this scene the crow drops the pebble into the water for the first time. As the pebble drops, it causes the water to ripple. The reflection of the crow can be seen in the water. Reactor is used to simulate the movement of the water. The pebble and pitcher are part of a rigid body collection, the pitcher is set to concave mesh to allow objects to pass into it. The pebble was given mass to allow it to fall and interact with the water. Although it first rolls out of the beak before dropping.

The lighting is the same, with a sphere used for the sky.

I think this is effective, as you are not directly seeing the event, but am viewing it in the reflection in the water. I would like to have made the water more realistic, but it wouldn't match the theme.

Monday, 26 April 2010

Scene 11

In this scene, the crow is carrying the newly acquired pebble back in it's beak. The skyline is a plane with self illumination set to 100. The pebble is held in the same way as in the previous scene. The walk sequence is the same .bip from previous scenes. And the lighting is the same also.

I wasn't sure if I should include the pebbles in this shot. I decided against it as it wasn't necessary, and it hides the distance between the pebbles and the pitcher.

Scene 10

In this scene, the crow bends down to pick up a pebble from the pile. It takes one in it's beak and gets up again. the knees are animated as are it's beak. To attach the pebble to the beak, I assigned the ponytail of the biped as the pebble's transform controller in the motion tab.

The lighting is a target directional light with area shadows.

The beak itself actually goes through the pebble it connects to, but this is hidden by the pebbles in front of it. If this wasn't the case I would have changed it.

This scene shows what the crow is doing, even if it isn't obvious to the viewer why yet. I believe it works with the story and the rest of the animation.

Sunday, 25 April 2010

Scene 8 & 9

In this scene the crow has realised that he cannot reach the water, but doesn't give up. Instead, he looks around for anything he can use to help him. When he does see something his eyes bulge. The animation is the crow standing up from a lower position, making it appear taller. The neck and head turn left and right, then the eyes are scaled and reverted.

I had a few problems getting to neck to turn, as it began to distort the skin after a while. However, I was able to do it by manipulating both the head and neck to get it to turn.

The lighting, as with the other scenes, is a target directional light.

I like this scene, as it makes it obvious that the crow is looking for something, that he finds it.

Scene 9

This scene shows the collection of pebbles that the crow has seen. There is no animation in this part, and is a bitmap render taken from scene 10.

Walking

I don't have a max file for the walking either, but it's a .bip with it's wings open, showing it's renewed strength and determination.

Friday, 23 April 2010

Scene 7

In this scene, the crow tries desperately to reach the water, but fails. The animation is of the crow's beak moving, while the body's Z position is lowered. This isn't visible as it's off camera.

A directed target light is used to illuminate the scene.

This scene suits it's purpose of showing that the water is too low for the crow to reach.

Scene 5 & 6

In this scene, you can hear the crow walking up to the pitcher and looking over the top. It is pretty much scene 4 from a different angle. The actual animation here is the crow moving in the direction of the pitcher then bending it's head to face downwards.

A direct target light illuminates the scene. The sky is a plane with a material on it. Everything is lit by a skylight in the scene, providing a more realistic light and shadow in the pitcher. This is used scarcely, as it dramatically increases the render time.

The fact that there is no walking animation is due to there not being a need, as only the head is visible. The neck also distorts the more you turn it, but again, this isn't visible so it was left. I had a problem where the beak went through the pitcher, but this was fixed by some repositioning.

The camera angle used is pretty effective, as it gives the view from the perspective of the pitcher, and gives an example of the depth.

The scene itself is useful, making it obvious that there is something in the pitcher that the crow is looking at.

Scene 6

I can't find the max file for this. It is probably scene 12 from a different angle. However, it is the crow looking into the pitcher and you can see the reflection of the sky on the water inside.

Tuesday, 20 April 2010

Scene 4

In this scene, you can see the crow fast-walking up to the pitcher and looking in. It is relatively quick, and the crow's wings are now spread and moving, giving the appearance of energy. The pitcher is embedded into the ground, and is an imported model.

There is a direct target light on the scene, with area shadows. This gives a slightly less realistic shadow in favour of decreased render time. This doesn't really matter as the animation is meant to be cartoon-style, so realism isn't high on the agenda as far as textures and shadows are concerned.

This scene suits it's purpose of introducing the pitcher to the animation.

Scene 3


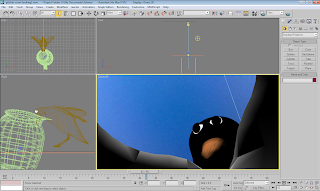
In this scene, the crow notices something in the distance and recognises it as a pitcher. He is hopeful that it contains water and gives an expression of excitement. The first thing you see is the crow stationary, then you zoom in on his eyes, in which you can see the reflection of the pitcher in the distance. The camera then zooms out and shows the crow in his new expression.

This is the first time the skyline is seen, and I believe it fits in well with the ground. The clouds on the horizon make it blend so the point where they intersect is not visible. The sky itself is is a sphere with 2-sided on, and a sky material which is self illuminating.

There is a single target directional light illuminating the scene. The sky material is self illuminating, so together this allows the reflection in the crow's eyes to seem more realistic and show everything.

I had a problem with the reflection in the eyes, as the eyelids are a material. This meant that the reflection appeared in the eyelids as well. I fixed this by adding an object on top of the eyes to simulate the eyelids. This is slightly visible at at the point the camera is at it's closest. I only noticed this when the video was collated so that is why it is still there. Also, it is only visible for less than a second.

The pose itself is inspired by the character Hiro from the television show "Heroes". As he uses it to show an expression of excitement or accomplishment.


I believe that the camera motion used is effective, as it highlights the main feature that I was going for (the eyes and the reflection in them.

Saturday, 17 April 2010

Scene 2

The next scene, you see the crow walking across the wasteland. It's wings are down to symbolise it's tiredness, and to show the heat of the area. It walks slowly from one side to the other, to give the appearance of it going on forever. The head bobs and the knees bend as the crow walks.

This is a very simple scene with just a walking animation. I had a problem with the .bip file to begin with, as it distorted the shape of the biped. However, this was fixed when I went back to the original and checked an option to only use current frames when saving the .bip.

As with the previous scene, there is a single target directional light illuminating the entire scene. The intensity multiplier is set pretty high to simulate the sun.

This scene is pretty simple, but effective in setting the scene.

Thursday, 15 April 2010

Scene 1

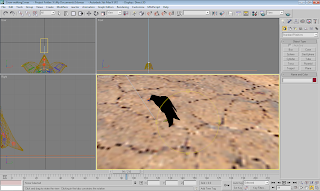
The first thing the viewer will see is an empty wasteland and will hear the footsteps of the crow approaching. Then the crow will come into view and you can see it's legs, tail and part of the wing. As it takes the first step in-frame, it leaves behind a footprint with my SID as text in it. This is the focal point of the scene, as the crow walks off stage.

Creating the footprint was pretty simple, it is the bottom of the crow's foot, modified to fit. The text is just a text shape. One problem I had was that the footprint wouldn't line up perfectly, so it had to be fixed into place. Also the issue of when it should appear came up, especially with the dragging-back motion of the crow's foot (this motion is to represent the crow's weariness and pushing himself forward causes his foot to slip). The shadow hides any inconsistencies however, so it worked out well.

One directional targeted light is used to light the scene, with a shadow map creating the shadow. I initially had an area shadow, however it didn't work well.

I like this scene, it gives a good example of the tone of the rest of the animation. I believe the ground texture represents the environment well.

Saturday, 10 April 2010

Pebble


For the pebble, I took a sphere and added a fractal noise modifier to it. I textured it and exported it so it could be used in the animations.

Friday, 9 April 2010

Flying

The first flight animation I made was the take off, the animation is of the bird bending down then jumping into the air, before flapping it's wings and flying away.

The second flight sequence is the bird motionless, apart from flapping it's wings.

Both files are .bip files, so they can be re-used.

Saturday, 3 April 2010

Walking/Running

I created a few new walk sequences, making the head bob and the knees bend properly.

I also made a fast walking sequence, which is the equivalent of running for a bird.

Thursday, 1 April 2010

Pitcher

To make the pitcher, I took a cylinder, and extruded the outer edge up and out to form the base.


I continued to extrude it until I reached the top. I pulled out one side to form the spout, and then enlarged and flattened the next extrude to form the rim.


I extruded one of the polygons on the side, ad shaped it to form a handle.


I added a MeshSmooth to get the final result.


I added a metallic texture and increased the bump to make it more realistic.

Friday, 26 March 2010

Motion

I prepared the model for animation by positioning it and altering the position of the legs.


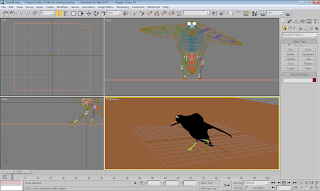
Using the biped tools, I manually made the walking sequence. For this, I altered the X position of the biped, while keeping one foot attached to the plane below. When the other leg was in position, I set that to stay fixed to the plane while moving the other. I used the copy and past pose tools to make it more accurate.

I saved the sequence as a .bip so I could use it again for my scenes.

Saturday, 20 March 2010

Texture

I used UVW unwrap to get a map for my model. I reduced the angle to make it easier, as the model is meant to be cartoon-style, there is little detail in it's texture.


I loaded the image into photoshop, coloured the areas and saved it to my model.


The eyes themselves are spheres with symmetry, and a texture applied to them.


Thursday, 18 March 2010

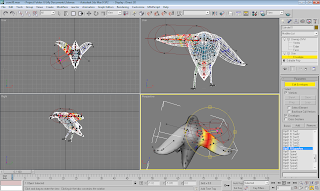
I began weighting all of the vertices to their respective bones.


I used the mirror mode tool to copy the weights on one side to the other. This sped up the process dramatically.


Monday, 15 March 2010

I discovered that it would be easier to cut the model in half and use symmetry to complete the legs and feet. Also, it would make adding bones simpler. I added a biped and begun matching it to my model. I increased the number of spine links, added a tail and added ponytails for the beak.


I finished the blue side, making changes as I went. When it was done, the leg, toes and wing were in place.

I copied the pose to the green side and it matched perfectly.


I added the skin modifier to the model and began to weight the vertices to the biped.


Wednesday, 10 March 2010

I made two polygons smaller, then extruded them to form the legs.


I continued extending the legs to form the shape.


Wednesday, 3 March 2010

Wings


I extended one side to form the wing, then added a meshsmooth to see how it would look, and to check for errors.


I repeated the process for the other wing and MeshSmooth'd again, giving my model the appearance of an actual bird.


I decided the head and neck were more reminiscent of a hummingbird rather than a crow, so I had to find a way to change it.


Sunday, 28 February 2010

Start of the crow


I took a cylinder , flattened it and cut off the end polygons. I then extended it to form the main body.


I carried on extending it and shaped the beak, splitting it in half to enable it to move later on.


I then extended the other end to form the tail, and met at the end.

This was the main body of the bird completed.


My main sources for the bird's shape is various images found on google search.

Tuesday, 23 February 2010